
Dyson cordless vacuums are loved for their portability and suction power, but like all devices powered by rechargeable lithium-ion batteries, their performance depends on the health of the battery. Over time, batteries lose capacity, leading to shorter run times and charging problems. At that point, many owners wonder: How do I remove my Dyson battery so I can replace it with a new one?
The good news is that Dyson designed most of its cordless vacuums with removable batteries, making replacement straightforward. This guide will walk you through everything you need to know—tools required, safety precautions, and step-by-step instructions for different Dyson models—so you can confidently remove and replace your Dyson battery like Dyson V8 battery at home.
Why Remove a Dyson Battery?
Before diving into the “how,” it’s worth understanding the “why.” You might need to remove the battery for several reasons:
- Reduced runtime – Your Dyson might only run for a few minutes before shutting off, even after a full charge.
- Not charging properly – If the charger light doesn’t turn on or the battery won’t hold a charge.
- Flashing red light – Dyson vacuums display blinking lights to signal battery health issues.
- General maintenance – Sometimes, removing the battery helps when resetting or diagnosing other problems.
Tools You’ll Need
Fortunately, removing a Dyson battery doesn’t require advanced tools. You only need:
- A small Phillips head screwdriver (commonly size #1 or #0).
- A clean surface to place screws so they don’t get lost.
- A replacement Dyson battery (if you’re planning to install a new one).
Safety Precautions Before Removing the Battery
Since you’re dealing with lithium-ion batteries, it’s important to follow a few safety rules:
- Turn off the vacuum – Never attempt to remove the battery while the vacuum is in use.
- Unplug from charger – Ensure the vacuum is not connected to power.
- Cool down the vacuum – If you’ve just used it, wait 10–15 minutes to let it cool before handling.
- Handle gently – Lithium batteries should not be punctured or crushed.
Step-by-Step Instructions for Different Dyson Models
Dyson cordless vacuums share a similar design, but the exact steps vary slightly by model. Below, we’ll cover the most popular series: Dyson V6, V7, V8, V10, and V11.
1. How to Remove a Dyson V6 Battery
The V6 is one of Dyson’s earliest cordless models, and its battery is easy to remove.
- Locate the screws – There are two screws holding the battery in place:
- One beneath the handle.
- One on the underside of the vacuum, near the dust bin.
- Unscrew both screws using a small Phillips screwdriver.
- Slide the battery downward and pull it away from the vacuum body.
- If installing a new battery, simply align it and tighten the screws back in.
2. How to Remove a Dyson V7 Battery
The V7 series follows the same principle as the V6.
- Identify the screws – Again, there are two screws: one under the handle and one underneath the body.
- Remove both screws carefully.
- Pull the battery downward until it detaches from the unit.
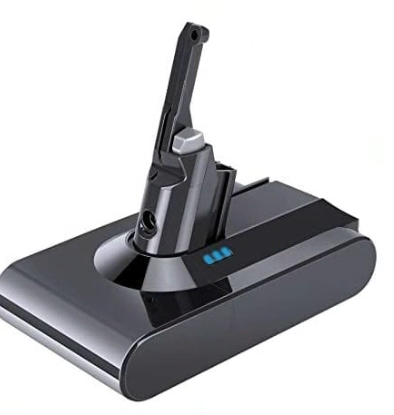
3. How to Remove a Dyson V8 Battery
The V8 is slightly larger but still simple to work with.
- Locate the screws – There are three screws on the V8 battery:
- One under the handle.
- Two on the underside of the vacuum.
- Unscrew all three screws with your screwdriver.
- Remove the battery by sliding it downward and away from the vacuum.
4. How to Remove a Dyson V10 Battery
The Dyson V10 introduced a redesigned body style, but the removal process is still straightforward.
- Locate the screws – The battery is secured with three screws:
- One at the rear handle.
- Two on the underside of the vacuum.
- Unscrew all three screws.
- Gently slide the battery out of the vacuum’s slot.
5. How to Remove a Dyson V11 Battery
The V11 features both standard and click-in batteries. The removal process depends on which type you own.
- For standard (screw-in) battery models:
- Unscrew the three screws (one on the handle, two underneath).
- Slide the battery downward to remove.
- For click-in battery models:
- Look for the red release button on the battery.
- Press and hold the button.
- Slide the battery straight out—no tools required.
Tips for Replacing Your Dyson Battery
Now that you’ve removed your battery, you might be installing a new one. Here are some tips to make sure your replacement works as expected:
- Buy compatible batteries – Always check that your replacement matches your Dyson model (V6, V7, V8, V10, V11).
- Charge fully before first use – New lithium-ion batteries should be charged for 3–4 hours before first use.
- Maintain good care habits – Avoid over-discharging (don’t run the vacuum until it completely dies every time). Store at room temperature.
- Keep the vacuum clean – A clogged filter or full dustbin can strain the battery and reduce runtime.
Common Questions About Dyson Battery Removal
1. How long does a Dyson battery last before it needs replacing?
On average, Dyson batteries last 3–5 years, depending on usage frequency and power mode.
2. Can I use third-party replacement batteries?
Yes, but quality varies. Using a genuine Dyson battery is safest, though reputable third-party brands may offer cost-effective alternatives.
3. What if the screws are stuck?
Use a precision screwdriver with the correct size to avoid stripping the screws. If necessary, apply gentle downward pressure.
4. Do I need professional help to remove a Dyson battery?
No—most users can remove and replace the battery at home in just a few minutes with basic tools.
Final Thoughts
Removing a Dyson battery may sound complicated at first, but as you can see, it’s actually a simple task that requires minimal tools and just a few minutes of your time. Whether you own a Dyson V6, V7, V8, V10, or V11, the process is nearly the same: locate the screws (or click-in button), remove them, and slide out the battery.
If your vacuum has been shutting off quickly or not charging at all, replacing the battery can bring it back to life and save you the cost of buying a brand-new vacuum. With a little care and the right replacement, your Dyson can continue serving you well for years to come.